Building the Living Area
- Ken Maskrey
- Mar 17, 2023
- 3 min read
Updated: Mar 20, 2023
Design
One of the main reasons for taking on this project was to increase my general DIY skills and designing and building the the interior was the bit I was looking forward to. It's one thing playing with a CAD program and quite another building it in the real world. Another option would have been to buy off the shelf kits and install them but that didn't seem as challenging.
In terms of design I had to include a seating area, shower, cooker, fridge and both cupboard and locker storage. A time-consuming part of the design process included the sourcing of the materials – lightweight ply, kitchen top, appliances, shower tray, toilet and the various construction materials. When I had the van fully insulated, plated with ply and the garage/bed area completed I accurately measured again and drew up the final design.


My initial designs included a tall cupboard next to the shower and had variations of where the sink, cooker and fridge should be but I finally arrived at the above design layout. This allowed me to produce a cutting guide and an estimate of the quantity of materials required. The light weight ply is expensive so mistakes or over ordering could be costly.

The sequence of my build was:
Lay the linoleum floor.
Complete the ceiling and lights.
Build and install the lockers as and when they can be.
Install the dividing panel between the garage/bed area and the living area.
Build the kitchen units.
Construct the shower area.
Finish the construction of the kitchen area.
Finish the construction of the shower area.
Complete the construction of the bench seat.
I'll just cover a few of the more difficult of these areas of the build.
Dividing Wall Between the Garage and the Living Area
The span across the van was more than the width of a sheet of lightweight ply so this had to be completed with two sheet and I didn't was to have an obvious join. Also, the sides of the van sloped inwards at a few points so required some accurate scribing. When both panels were cut out for fitting, I joined them using biscuits for strength. I also routed along exposed edges and inserted T-edging that matched the oak effect panels.


Lockers
I designed the lockers in SketchUp which meant I could build a list of all the cuts and their sizes. Once I had cut all the components it was a simple matter of joining them.


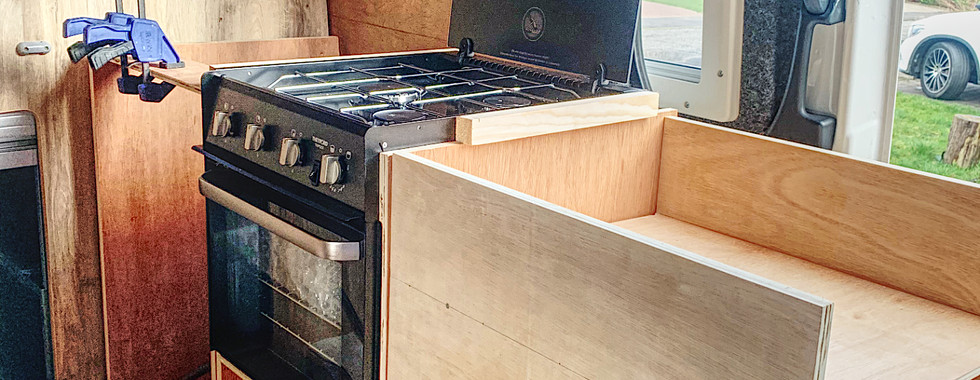
Kitchen Area
The most tricky part of the kitchen area build was the overhang at the door and sealing the area under the cooker where the gas drop out was located. I built two units – one for the cooker and another for the fridge. Ensuring the cabinets are square and the sides parallel is essential so that the drawers run true.
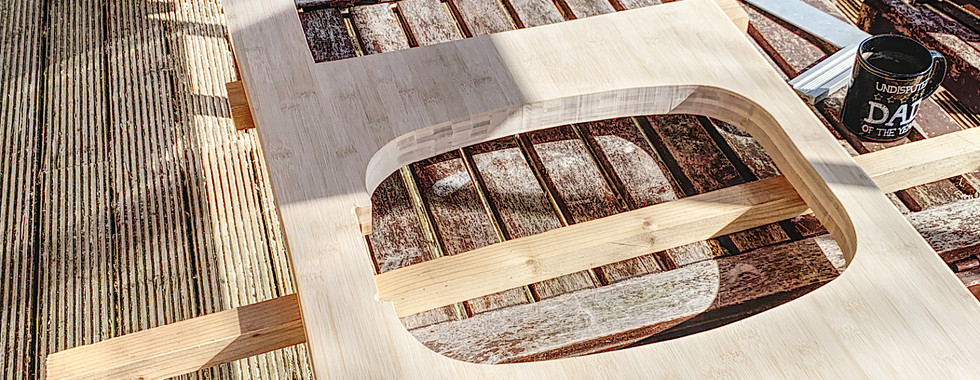
The kitchen worktop top is made of bamboo which once cut to size needed sealed with an appropriate oil to protect it. I used the cut out part of the sink to create a chopping board which fitted neatly into the sink for storage. The worktop needed scribed to follow round the door area.


Shower Area
The most important criteria for the shower was to ensure all water stayed within the cubicle. I also build a frame to hold the shower tray and stop it flexing. I use a tambour door which closed magnetically to save space and had a hot air feed from the Truma so that it could also be used as a drying room. I used Thetford shower tray and cassette toilet combination and had the doors to the cassette and flush reservoir to the inside of the van. The drain goes straight through the floor and off to a grey water tank that is installed just behind the spare wheel.


Benchseat and Table
The benchseat had to be made big enough to hold the Truma boiler and allow quick access to it. I designed it so that the seat could be easily and quickly removed. I also made the cushions which sat on cut down IKEA bed struts.


I made the table with some offcuts I bought on Ebay. I glued them to a piece of ply and then glued another piece of leftover ceiling panel to the other side. I cut to size, sanded and varnished and then routed the edge and applied some T-edging. It was an inexpensive way of making a table and a lot cheaper than buying it online.


Next stage: finishing touches


