LPG Tank and Truma Boiler
- Ken Maskrey
- Mar 16, 2023
- 4 min read
Updated: Mar 17, 2023
Underslung Tank
SAFETY: I should say at the outset that you should seek professional assistance if wish to install gas. This is not a thing to be taken on lightly.
This was probably the most difficult aspect of the build. Not only were there technical problems but practical problems too. The main thing was to have minimum opportunities for gas to escape and if it did have routes for where it could escape safely through dropouts.
When routing your copper pipe there should be continuous pipes without breaks from source to appliances or at least kept to a minimum. I devised a system that came from the tank, through the floor to a manifold near the Truma and then split to the Truma and to the cooker. The only other possible escapes were where the gas connected the Truma or the cooker. I also installed an external solenoid cut off valve next to the tank that could be operated within the van and could off the gas. I also could cut off the supply of gas at the manifold next to the Truma. I also installed a CO monitor just below the entry of the sleeping area since CO is heavier than air and fills from the bottom up.
At each point where gas could escape I sealed the area and put floor vents in so the gas would flow out the van and disperse.
Once the systems was fully complete I had a qualified gas engineer check it and certify it safe.
These are all very important considerations that, I would say, must be adhered to.
I opted to install a large, underslung Autogas container. I also wanted to have heating, hot water and full cooking facilities and not worry about supply of gas. It was important to me to have the gas bottle outside and save space and I looked at at various types, including one that replaces the spare wheel, but finally plumped for the one that fits in a void behind the driver position. Autogas have very handily produced mounting brackets specifically for my van and their tanks. I also purchased a regulator, filling hose, filling point and bracket, regulator and solenoid.
You might wish to install a bottle system but the above applies. With a bottle system you still have to have a sealed box with a dropout for all areas where gas could escape. (Correct me if I'm wrong).
First thing was to protect the tank by spraying them with chip guard and spray the brackets with primer and paint to protect against rust. Fitting them is probably a two-person job – holding the tank in place while trying to secure bolts under the van is quite tricky but can be done. In the ideal world this would be done on a ramp.


The standard gauge was replaced with the electric one (and enough cable was added to reach the gauge inside the van) so that I could monitor the gas level from inside the van. I fitted the regulator and feed hose to the tank. You have to drill a few holes underneath your van in order to fix the brackets. Make sure any holes are properly protected from moisture by using Waxoil or something similar. Ensure when you fit the tank that it is the right way up otherwise the gauge won't work. Sounds obvious but it does seem to occur quite frequently.
After the brackets are fixed (using locking nuts!) and the tank secured it's time to drill more holes for the copper pipe gas feed into the van. The fewer cuts in your gas pipe the better because there is less chance for gas escape. I have one length of pipe from the tank to a manifold. One length from the manifold to the Truma boiler and one to the cooker. The feeds can be shut off separately at the manifold. I used gas pipe that is protected with a plastic coating. The most difficult part was bending the pipe (invest in a good set of pipe benders) since you can't have any crimps which hamper the gas flow. And having such a long stretch from the manifold to the cooker any mistake meant I'd need to buy more pipe.


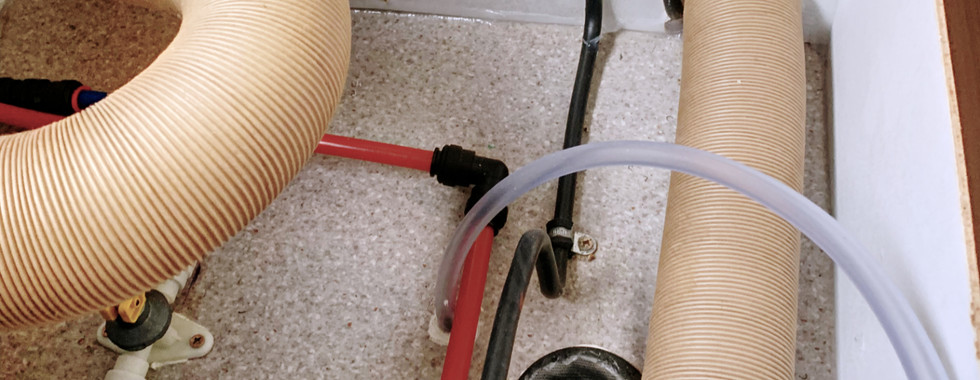
I then turned to the Truma boiler. This is quite an expensive piece of kit but it provides hot air heating and hot water. I felt that if I was away for any length of time the I needed a shower and if I was in the Highlands of Scotland at any time other than summer then I also needed heating. So Truma seemed the perfect solution.
The instructions that come with the boiler are fairly comprehensive. The two main things are cutting a hole in the side of your van for a vent and one through the floor for the overflow. There is also running the cable up to wherever you decide to place the control panel, a 12v feed and a 240V fused socket which were run at first fitting.

Next stage: furniture build

